
how to make the ultimate charcuterie and cheese board
note: this post contains affiliate links and I will be compensated if you make a purchase after clicking on my links.

Let’s just start off by saying I am a huge meat and cheese lover. My husband and I bonded over this love affair and started judging our favorite restaurants off their charcuterie offerings. Therefore, it’s my go-to when I’m in charge of bringing an appetizer to a party. I’ve learned my best techniques through trial and error, and pinterest, obvi, so I thought I’d share some of them with you!
what you need
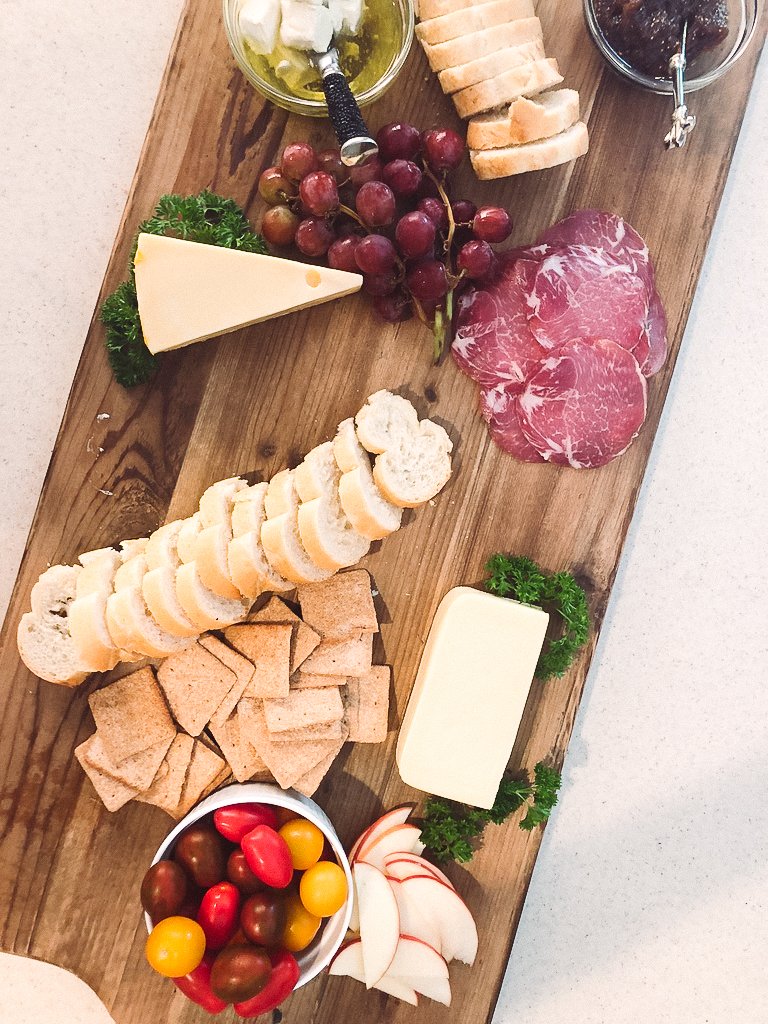
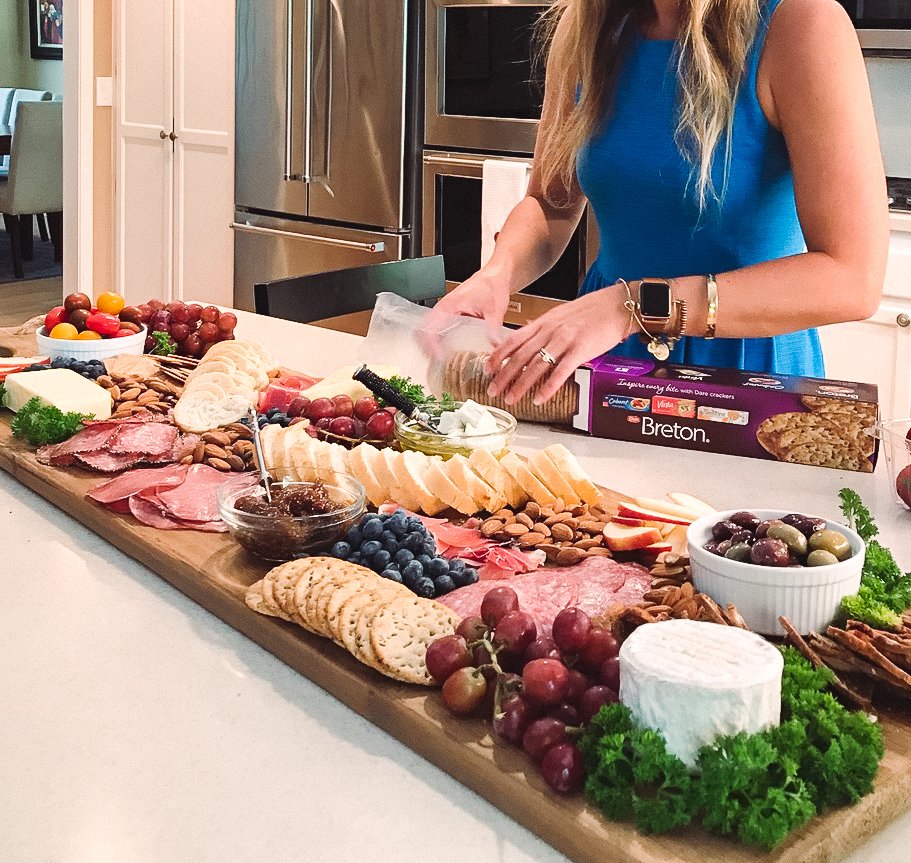
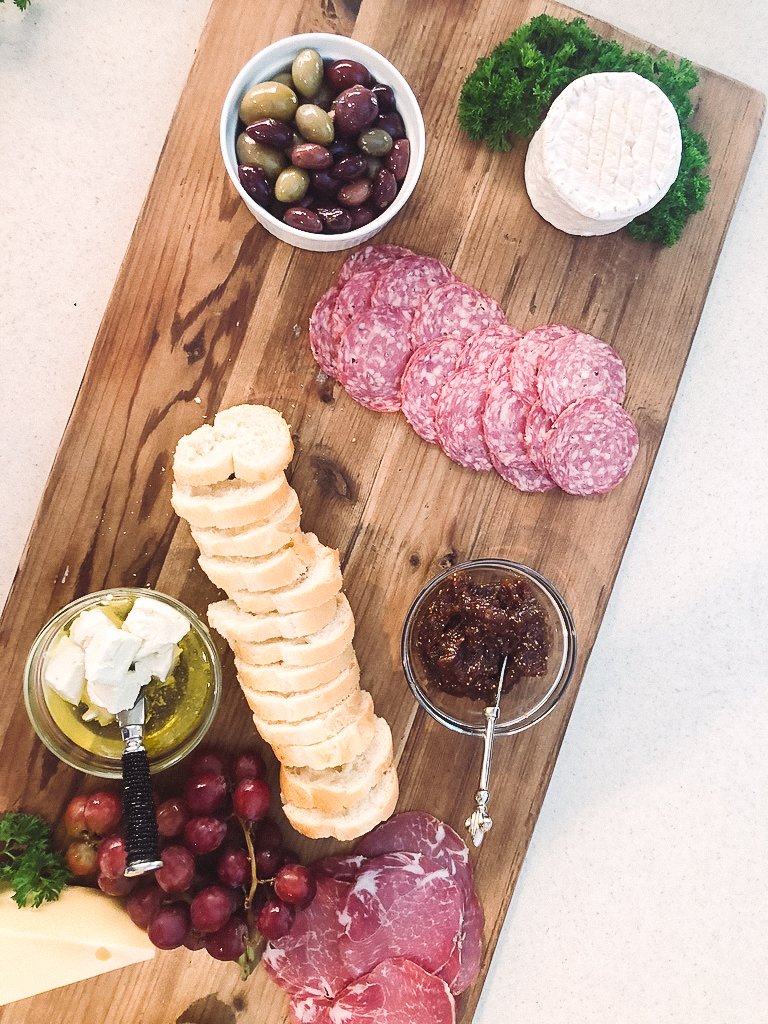
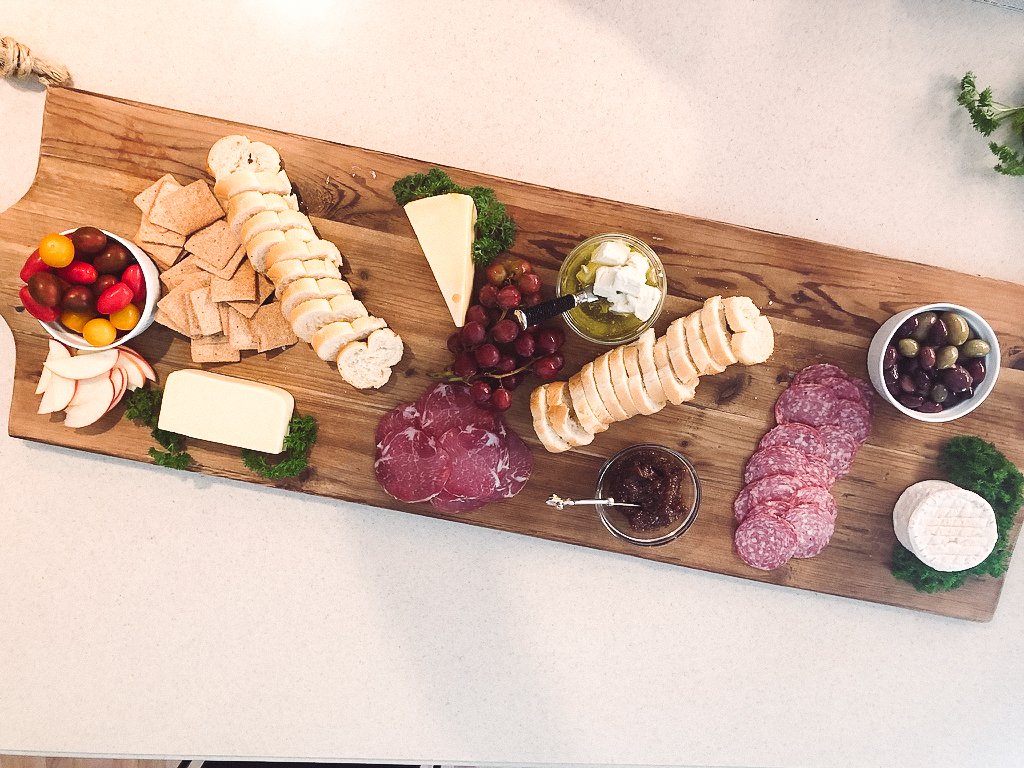
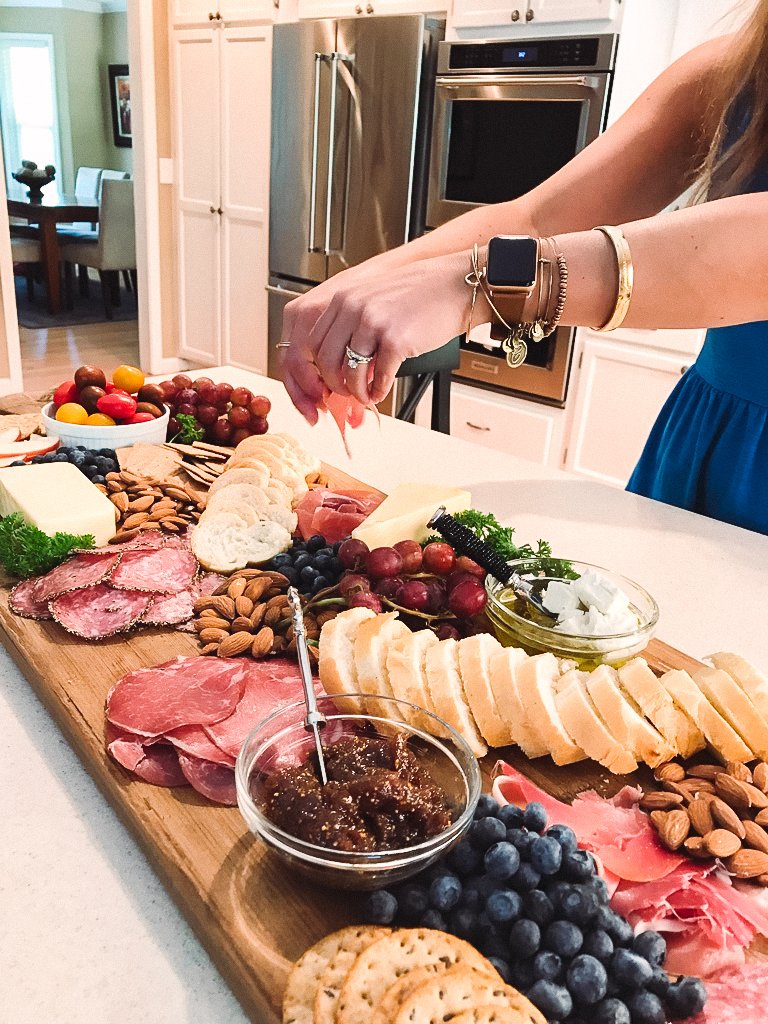
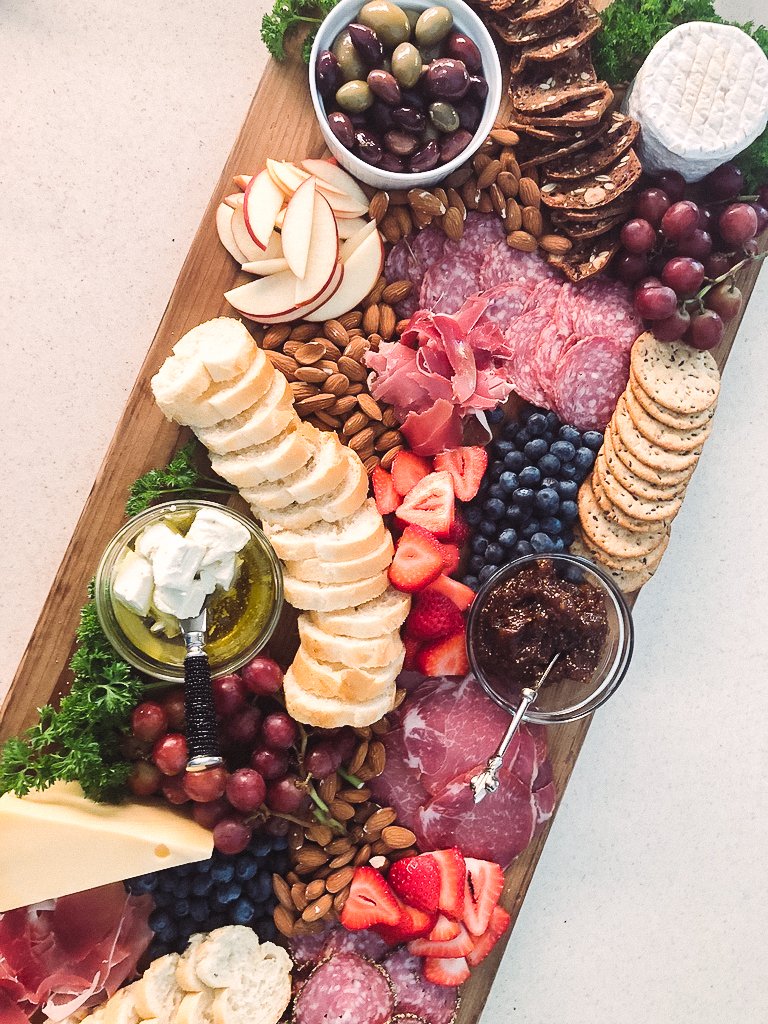
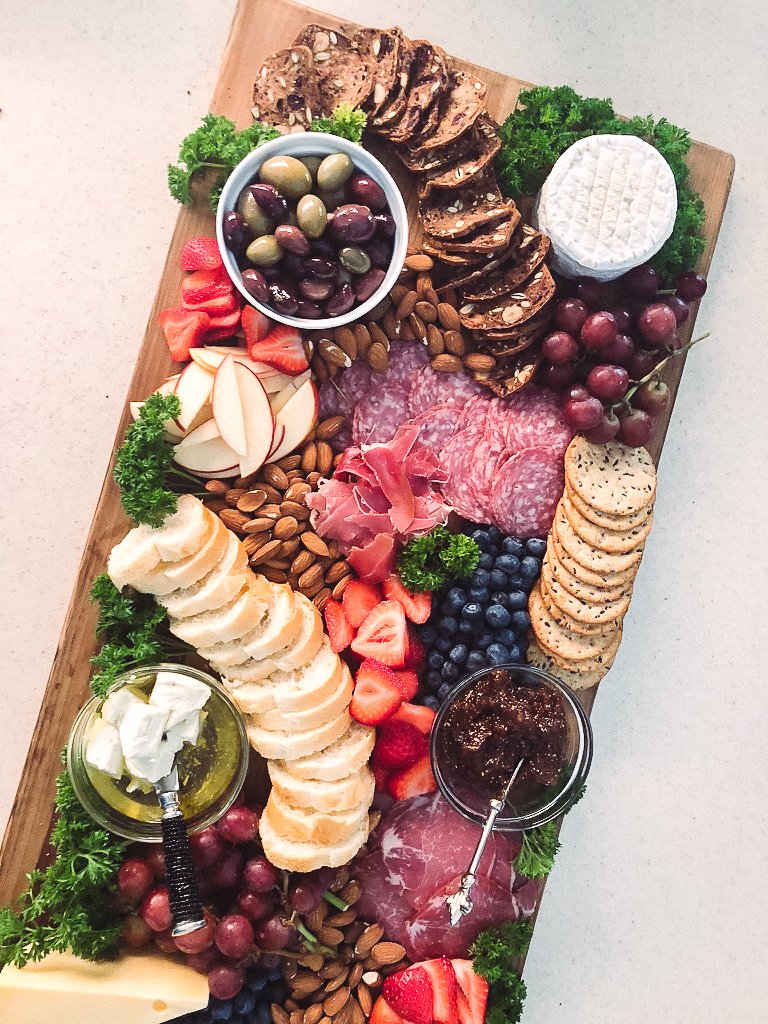
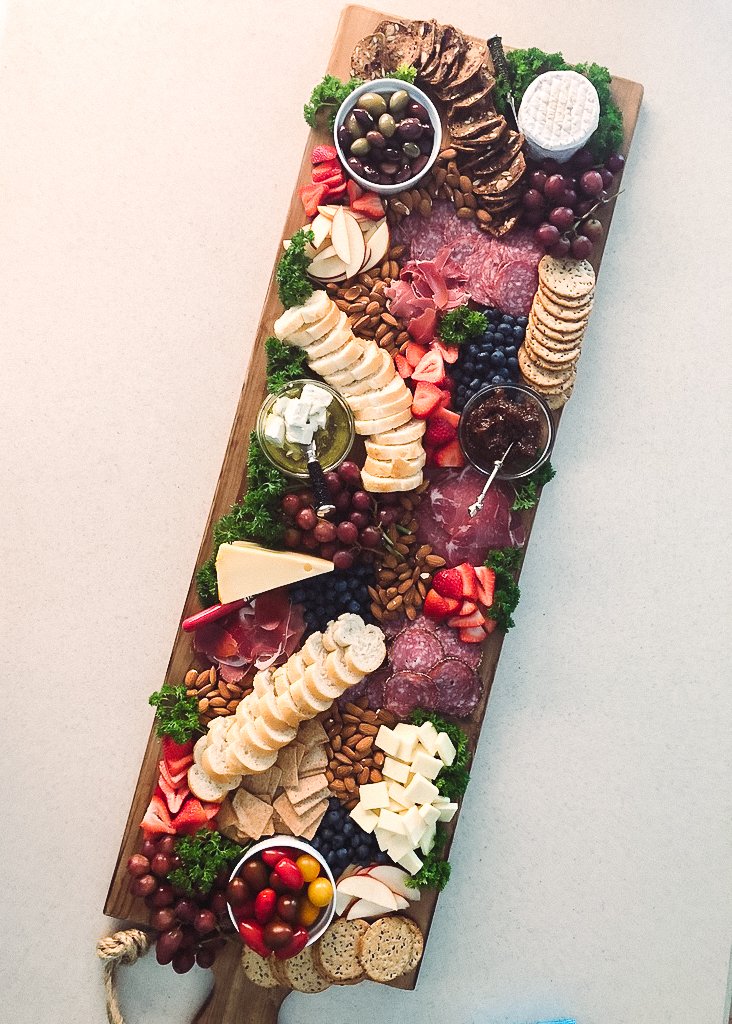
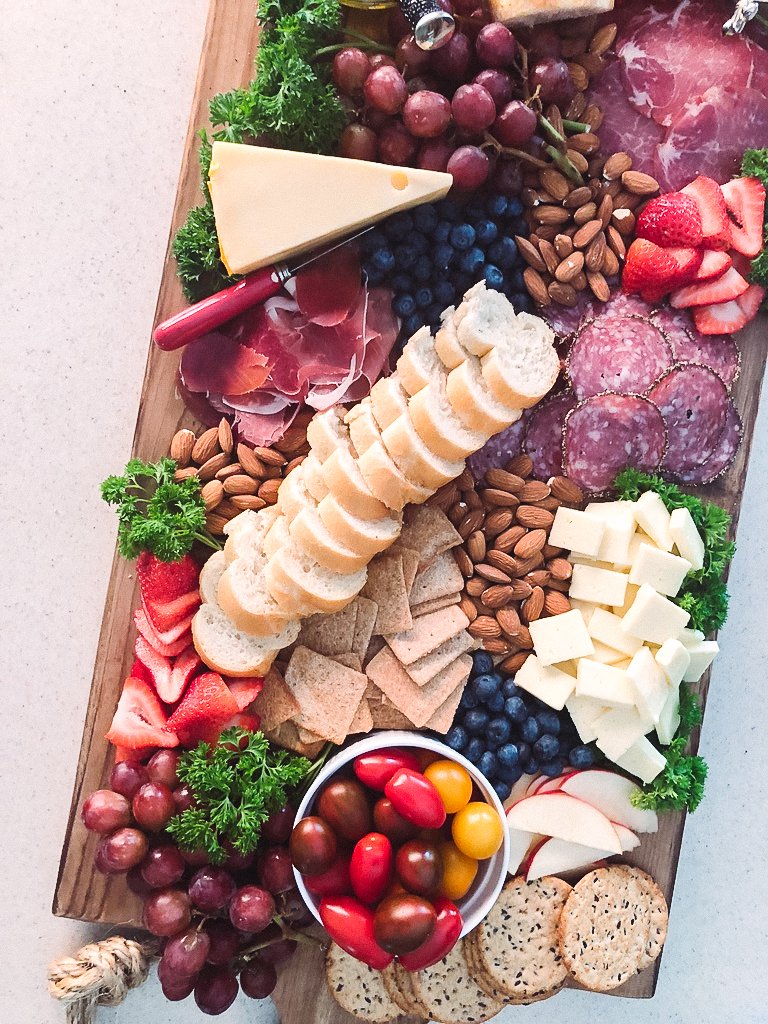
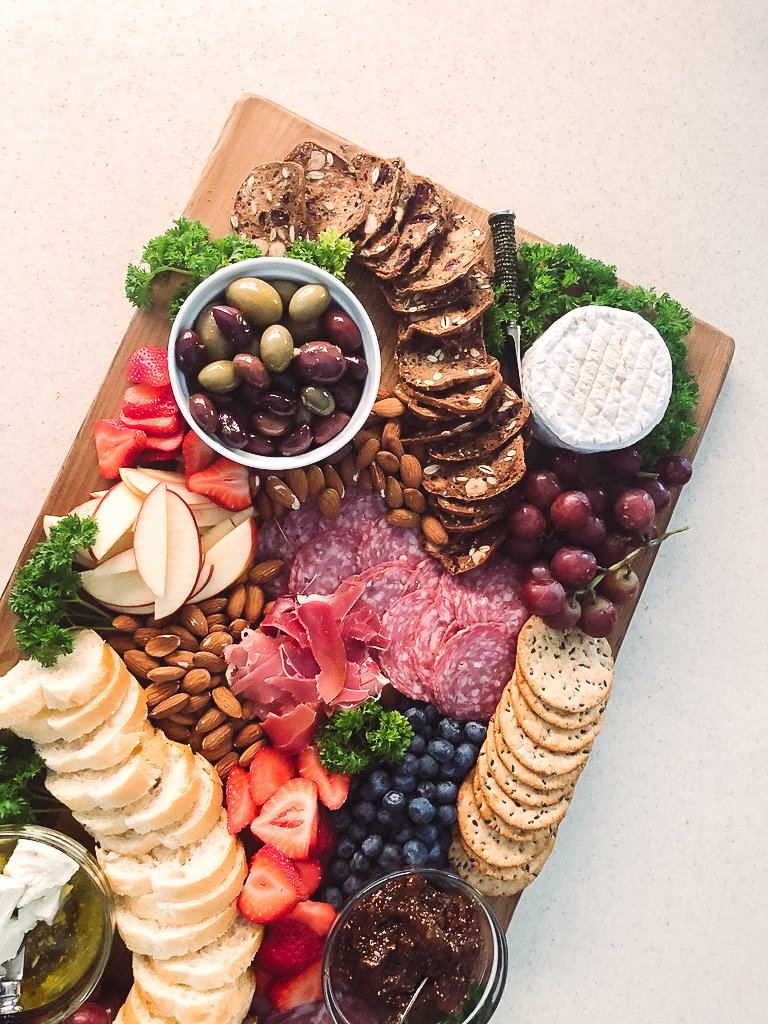
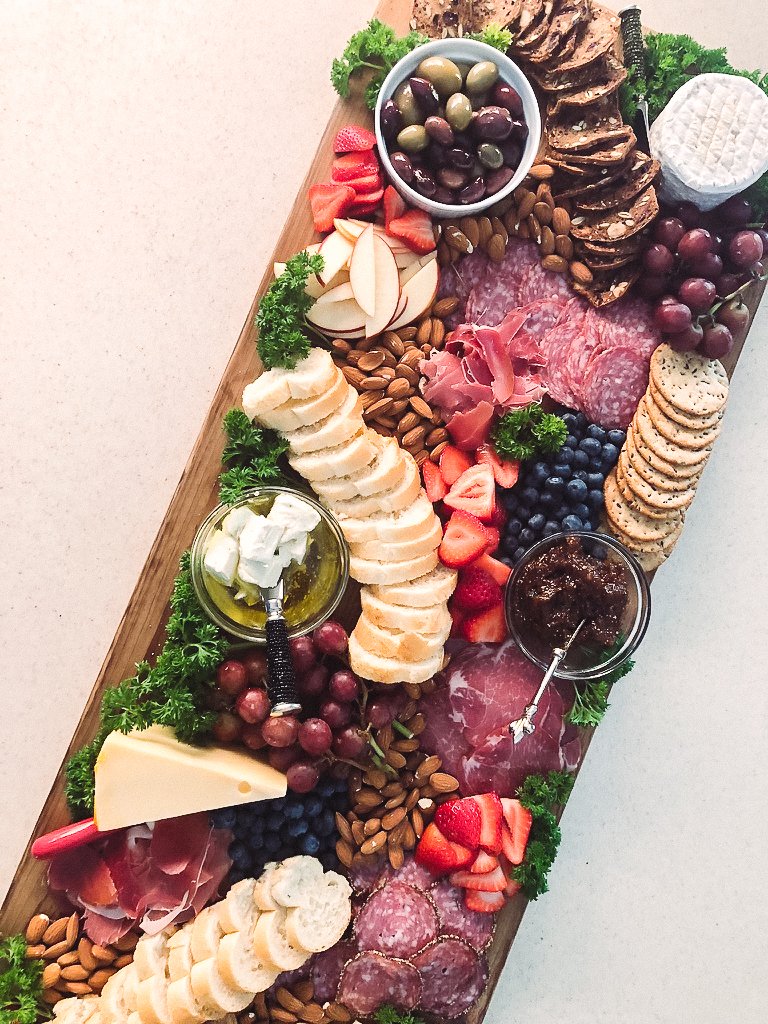
Meat: a variety of cured meats – my favorites are salami, prosciutto, and coppa. You can typically find variety packs at your local grocery store (or even Costco!) and that way you don’t have to buy a huge pack of each thing.
Cheese: again, you want a variety – I like to get at least one soft and one firm/hard cheese. If you have room for more than that, you can add a fresh, semi-soft, or veined cheese. Everyone has their personal preference so it’s nice to offer a variety of taste and texture. A few of my favorites are burrata (fresh), triple cream brie (soft), creamy havarti (semi-soft), gouda (firm), manchengo (hard), and I hate veined cheese, but I hear that gorgonzola is good 😏
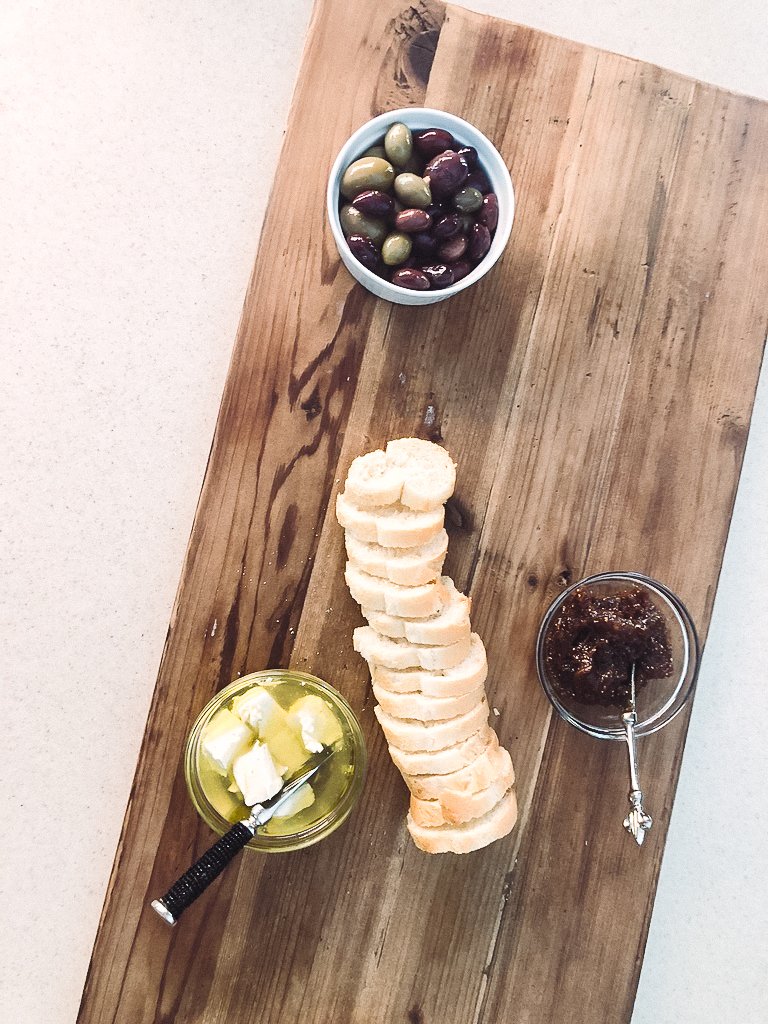
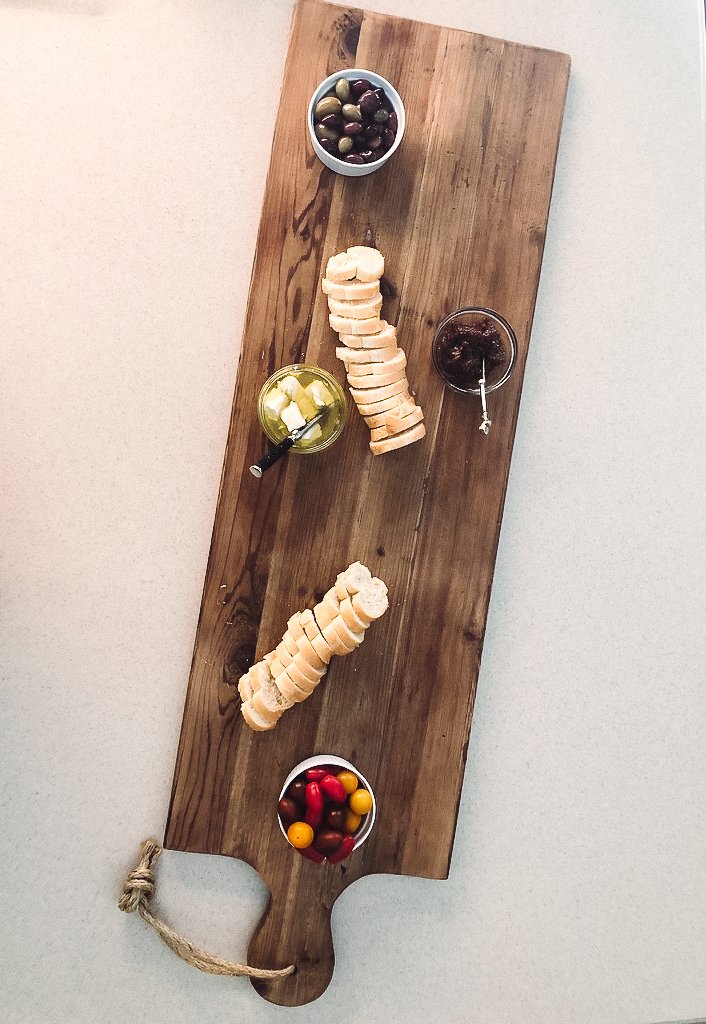
Spread: sweet and savory spreads are the perfect complement to any platter. Think honey, apricot preserves or fig jam.
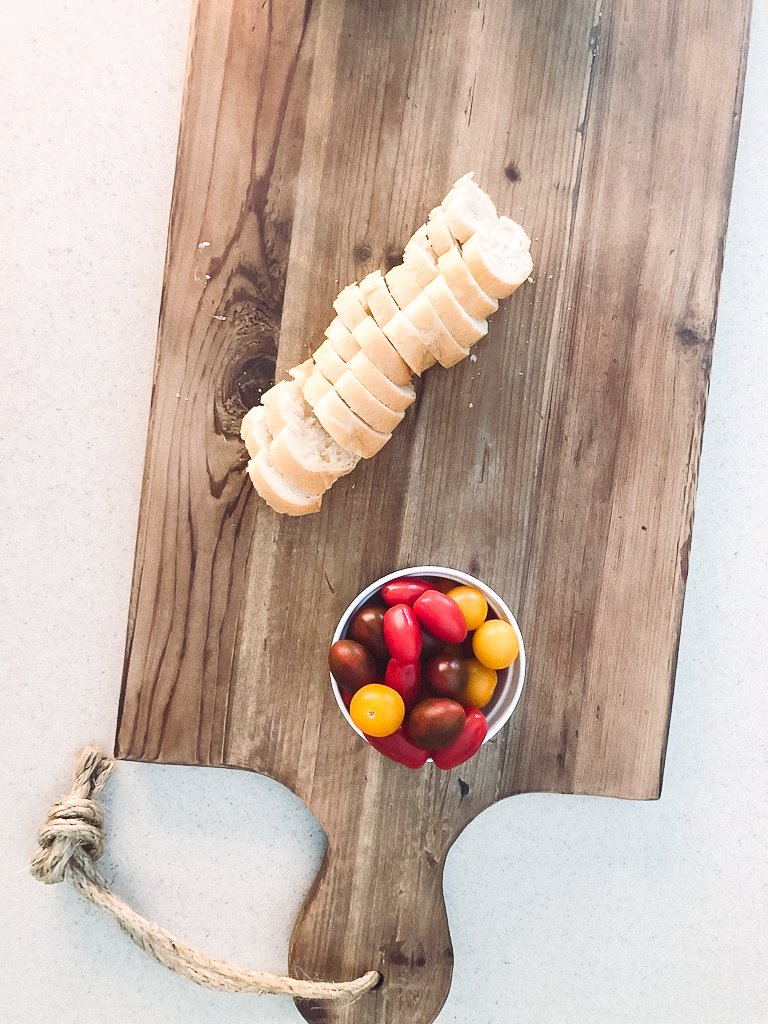
Fruit: you can go dried or fresh with this, but I always prefer fresh - it's tastier and prettier, which is ideal for that instaworthy platter 😉. Some people like to combo their meat with a fruit (for example prosciutto wrapped fig) or their cheese (that creamy havarti cheese with a slice of apple and drizzle of honey is 🙌🏽). I also just love the freshness it adds; and a piece of fresh fruit can be a nice break in between bites of salty, creamy goodness. My favorites? Grapes and apples for sure. I also go for berries – strawberries, blackberries, blueberries, etc.
Nuts: another perfect palate cleanser between bites and they add some contrast in color to the platter. I usually go with pistachios, almonds, pecans or walnuts.
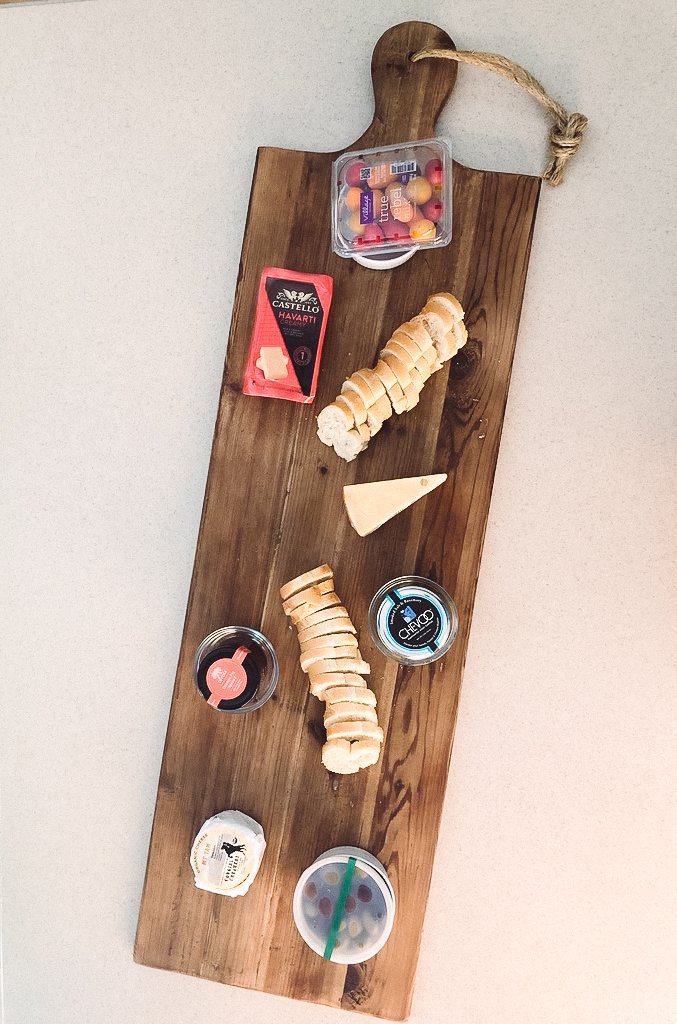
Bread and Crackers: you don’t need too many options with this, but I typically offer a baguette and a cracker. Just keep it simple because these can take up a lot of space and we want all the meat and cheese we can get.
Pickles: pickled vegetables go hand in hand with meats and cheeses. Gherkins and olives are great for any platter. If you want more than those, marinated artichokes and pickled green beans or cocktail onions can be a great addition.
Paté: this isn’t always on my platters but can be a crowd pleaser for the right group. Paté (or meat paste) isn’t for everyone, but I gotta say it is delicious spread over a cracker or toasted baguette.
Greens: I love adding a little touch of greenery to the platter. Mostly adding something like arugula will just help you create a better presentation, but some people also like to add it to a bite.
Tools: a board (can be marble, wood, slate, whatever you have on hand), cheese knives, cheese markers (this isn't necessary, but recommended if you don't want to have to tell every single person that sees the board what each item is), and small bowls. You can shop all my favorites at the end of this post!


presentation
This part can be very daunting. But just remember, you cannot mess this up. I repeat, you cannot mess this up. There is no right or wrong way. This is your time to get creative and do whatever you want.
The daunting part: sometimes you don’t even know what you want or how to be creative! I get it. I’ve been there. Where do you start? First with your larger items. Place your bowls with olives, spreads, etc on your platter and put them on opposite ends. Then your breads and crackers – I like to lay them out in a row so they are easy to grab – and of course, pre-slice your baguette. Next, add your cheeses and meats. And lastly, use your fruits and nuts as fillers.
a couple pro tips:
Cut into your cheeses. Some people will shy away from being the first to cut into it, so just shove a knife in there and take that fear away. If the cheese is a semi-firm to firm cheese, you can also cut it into cubes or slices so it’s easier to grab.
Separate your meats. When you get cured meat from the store, it’s usually fanned out by slice, but it’s always stuck together, and you don’t want to feature a long row of salami. Wash your hands (but also, if you haven’t done that already then shame on you) and pull apart each piece. You can just put them back on top of each other, or you can roll them for some added texture. I also like to shred the proscuitto into thinner strips so there are more pieces to share.
Pile on the fillers. You want to fill in all the space so you cannot see the bottom of the board. Trust me, that’s what makes it look to pretty – it’s full and delicious.
Enjoy!

shop this post
